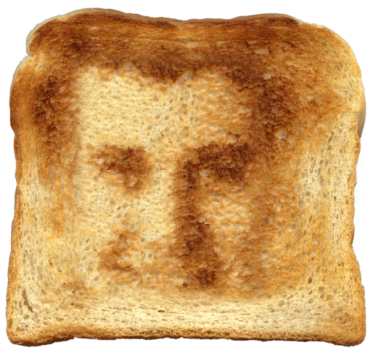
The goal of this assignment is to implement the image quilting algorithm for texture synthesis and transfer, described in this SIGGRAPH 2001 paper by Efros and Freeman. Texture synthesis is the creation of a larger texture image from a small sample. Texture transfer is giving an object the appearance of having the same texture as a sample while preserving its basic shape (see the face on toast image above). For texture synthesis, the main idea is to sample patches and lay them down in overlapping patterns, such that the overlapping regions are similar. The overlapping regions may not match exactly, which will result in noticeable edges. To fix this, you will compute a path along pixels with similar intensities through the overlapping region and use it to select which overlapping patch from which to draw each pixel. Texture transfer is achieved by encouraging sampled patches to have similar appearance to a given target image, as well as matching overlapping regions of already sampled patches. In this project, you will apply important techniques such as template matching, finding seams, and masking. These techniques are also useful for image stitching, image completion, image retargeting, and blending.
Here, I have included some sample textures to get you started (these images are taken from the paper). You will implement the project in several steps.
Create a function quilt_random(sample, out_size, patch_size) that randomly samples square patches of size patch_size from a sample in order to create an output image of size out_size. Start from the upper-left corner, and tile samples until the image are full. If the patches don't fit evenly into the output image, you can leave black borders at the edges. This is the simplest but least effective method. Save a result from a sample image to compare to the next two methods.
Create a function quilt_simple(sample, out_size, patch_size, overlap, tol) that randomly samples square patches of size patch_size from a sample in order to create an output image of size out_size. Start by sampling a random patch for the upper-left corner. Then sample new patches to overlap with existing ones. For example, the second patch along the top row will overlap by patch_size pixels in the vertical direction and overlap pixels in the horizontal direction. Patches in the first column will overlap by patch_size pixels in the horizontal direction and overlap pixels in the vertical direction. Other patches will have two overlapping regions (on the top and left) which should both be taken into account. Once the cost of each patch has been computed, randomly choose on patch whose cost is less than a threshold determined by tol (see description of choose_sample below).
I suggest that you create two helper functions ssd_patch and choose_sample. ssd_patch performs template matching with the overlapping region, computing the cost of sampling each patch, based on the sum of squared differences (SSD) of the overlapping regions of the existing and sampled patch. I suggest using a masked template. The template is the patch in the current output image that is to be filled in (many pixel values will be 0 because they are not filled in yet). The mask has the same size as the patch template and has values of 1 in the overlapping region and values of 0 elsewhere. The SSD of the masked template with the input texture image can be computed efficiently using filtering operations (see tips section down below), producing an image in which the output is the overlap cost (SSD) of choosing a sample centered at each pixel.
choose_sample should take as input a cost image (each pixel's value is the cost of selecting the patch centered at that pixel) and select a randomly sampled patch with low cost, as described in the paper. One way to do this is to first find the minimum cost minc and then to sample a patch within a percentage of that value:
row, col = np.where(cost < minc*(1+tol)) . If the minimum is approximately zero (which can happen initially), it might make sense to set minc to a larger value, e.g., minc=max(minc,small_cost_value);. Another way is to sample one of the K lowest-cost patches.
After a patch is sampled, its pixels should be copied directly into the corresponding position in the output image. Note that it is very easy to make alignment mistakes when computing the cost of each patch, sampling a low-cost patch, and copying the patch from the source to the output. Use an odd value for patch_size so that its center is well-defined. Be sure to thoroughly debug, for example, by checking that the overlapping portion of the copied pixels has the same SSD as the originally computed cost. As a sanity check, try generating a small texture image with low tolerance (e.g., 0.00001), with the first patch sampled from the upper-left of the source image. This should produce a partial copy of the source image. Once you have this function working, save a result (with higher tolerance for more stochastic texture) generated from the same sample as used for the random method.
Next, incorporate seam finding to remove edge artifacts from the overlapping patches (section 2.1 of the paper):
Your final task is to create a function texture_transfer, based on your quilt_cut function for creating a texture sample that is guided by a pair of sample/target correspondence images (section 3 of the paper). You do not need to implement the iterative method described in the paper (you can do so for extra points: see Bells and Whistles). The main difference between this function and quilt_cut is that there is an additional cost term based on the difference between the sampled source patch and the target patch at the location to be filled.
Submission is similar to project 1: create a web page and thumbnail and submit code/text/link on Compass. See project instructions for details. Remember to specify how many points you think you should get (and for what) in your Compass submission.
Use words and images to show what you've done. Please:
The core assignment is worth 100 points, as follows:
You can also earn up to 85 extra points for the bells & whistles mentioned above. To get full points, you must implement the method, show the requisite results, and explain and display results clearly.