Solo MP This MP, as well as all other MPs in CS 225, are to be completed without a partner.
You are welcome to get help on the MP from course staff, via open lab hours, or CampusWire!
Checking Out the Code
You can find the code for all our released assignments at the following public git repo.
You can either clone this or pull a zip file of the repo to your local computer. All the files for this MP are in the mp_stickers directory. You should copy that directory into the directory you setup for your docker container.
Preparing Your Code
This semester for MPs we are using CMake rather than just make. This allows for us to use libraries such as Catch2 that can be installed in your system rather than providing them with each assignment. This change does mean that for each assignment you need to use CMake to build your own custom makefiles. To do this you need to run the following in the base directory of the assignment. Which in this assignment is the mp_stickers directory.
mkdir build
cd build
This first makes a new directory in your assignment directory called build. This is where you will actually build the assignment and then moves to that directory. This is not included in the provided code since we are following industry standard practices and you would normally exclude the build directory from any source control system.
Now you need to actually run CMake as follows.
cmake ..
This runs CMake to initialize the current directory which is the build directory you just made as the location to build the assignment. The one argument to CMake here is .. which referes to the parent of the current directory which in this case is top of the assignment. This directory has the files CMake needs to setup your assignment to be build.
At this point you can in the build directory run make as described to build the various programs for the MP.
You will need to do the above once for each assignment. You will need to run make every time you change source code and want to compile it again.
Understanding the HSL Color Space
In CS 225, we will not be working with the physical properties of color that you may be familiar with from other sources (the “RGB color space” for red-green-blue channels.) Instead, we will be using an alternative color space that represents colors by human perception of color.
The HSL color space uses the Hue, Saturation, and Luminance of the color. From the Adobe Technical Guides page on “The HSB/HLS Color Model”, Adobe explores these terms:
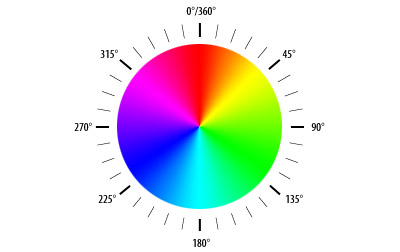
Hue (denoted as h) defines the color itself, for example, red in distinction to blue or yellow. The values for the hue axis run from 0–360° beginning and ending with red and running through green, blue and all intermediary colors like greenish-blue, orange, purple, etc.
There are two hues that we’ll use later in this MP:
- “Illini Orange” has a hue of 11
- “Illini Blue” has a hue of 216

Saturation (denoted as s) indicates the degree to which the hue differs from a neutral gray. The values run from 0%, which is no color saturation, to 100%, which is the fullest saturation of a given hue at a given percentage of illumination.

Luminance (denoted as l) indicates the level of illumination. The values run as percentages; 0% appears black (no light) while 100% is full illumination, which washes out the color (it appears white).
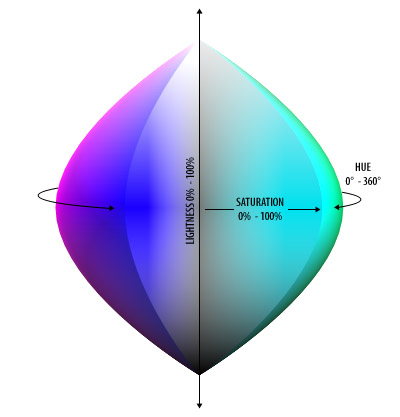
The full HSL color space is a three-dimensional space, but it is not a cube (nor exactly cylindrical). The area truncates towards the two ends of the luminance axis and is widest in the middle range. The ellipsoid reveals several properties of the HSL color space:
- At
l=0orl=1(the top and bottom points of the ellipsoid), the 3D space is a single point (the color black and the color white). Hue and saturation values don’t change the color. - At
s=0(the vertical core of the ellipsoid), the 3D space is a line (the grayscale colors, defined only by the luminance). The values of the hue do not change the color. - At
s=1(the outer shell of the ellipsoid), colors are vivid and dramatic!
Part 1 (Curated): The Image Class
An Image object is a subclass of the PNG class. This means it inherits all
the member functions of the PNG class; so anything you could do with a PNG,
you can also do with an Image.
After creating the Image class, implement the methods of the Image class:
Here is one example of one transformation that the Image class can do.
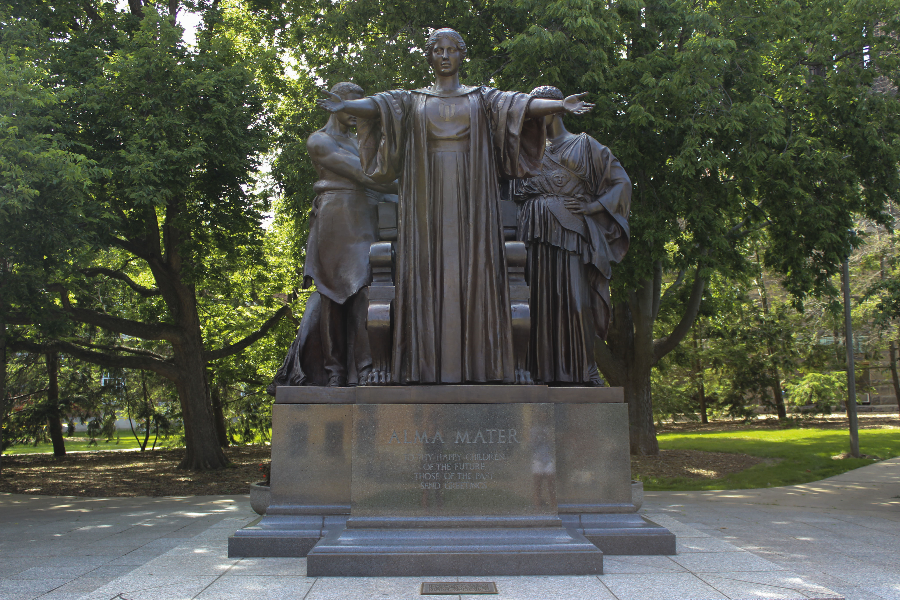
This is the original picture stored in an Image class.
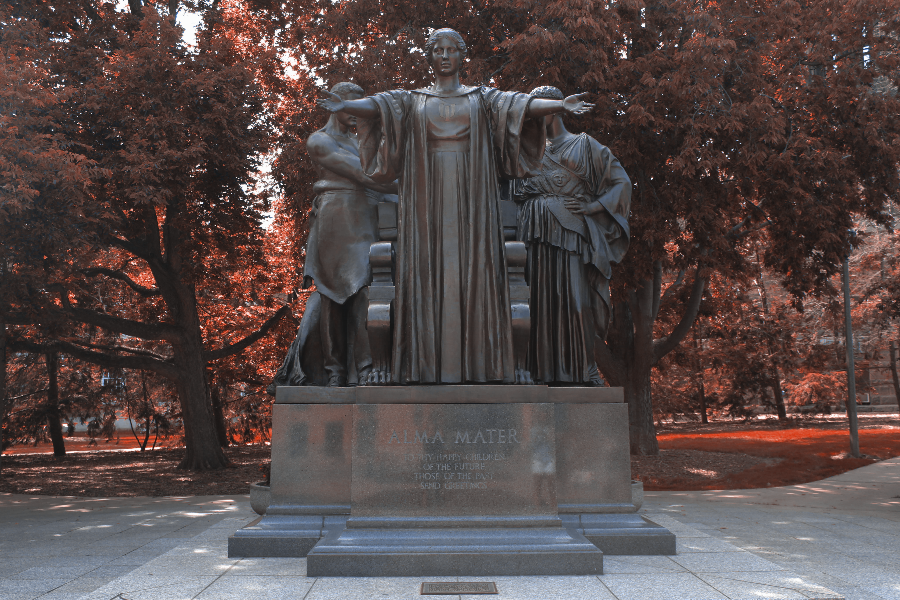
To illinify an image is to transform the hue of every pixel to Illini Orange or Illini Blue.
The hue of every pixel is set to the a hue value of either orange or blue, based on if the pixel’s hue value is closer to orange than blue. Remember, hue values are a circle!
Testing
When you’ve finished this part, you can make and run Part 1 by running:
make testimage
./testimage
If execution goes smoothly, images named lighten.png, saturate.png, and scale2x.png will be created in your working directory.
- The files
expected-lighten.pngandexpected-saturate.pngare provided and can bediffed with your output. - The file
expected-scale2x.pngis somewhat misnamed, as there are many correct solutions when you scale an image. It is not necessary to have itdiffto the same image. So long as your scaling algorithm creates a reasonable scale of the original image, our autograder will see it as a reasonable scaling of the image. You can verify this by running the automated tests on Part 1.
Automated Testing
To test your code using Catch, run the following:
make test
./test
Part 2 (Curated): The StickerSheet Class
Let’s add stickers on top of an image!
Your goal in this part of the MP is to make a StickerSheet composed of a collection of Images. To do so, you will create a class StickerSheet that will maintain an array of pointers to Image objects. Each Image in the StickerSheet will have an index, an -coordinate, and a -coordinate. The member functions described below will support creating, modifying, and drawing the collection of Image stickers in the StickerSheet.
To implement the StickerSheet class, you will write a header file that contains a declaration of the StickerSheet class (StickerSheet.h) and a source file that contains the implementation of the StickerSheet class (StickerSheet.cpp).
There are two considerations that you should keep in mind while working on the StickerSheet class. Unless you are told otherwise you are welcome to use anything in the STL or Standard Template Library. This is the standard library for the C++ language.
STL Vector We sugest that you consider are using the Standard Template Library (STL) vector in implementing this class. Try searching for “STL vector” to learn how to use it.
The second consideration is that our assignments are quite specific about what you are required to do. In this case you should consider very carfully what you are actually being asked to store. For example if you carefully read the specification you will see that in the description of the StickerSheet class we specify that you store a pointer to an Image in the array of images not an Image. Taking advantage of this specification should greatly simplify your implementation.
To see all the required functions, check out the Doxygen:
Part 3 (Creative): Create an image with stickers!
For the last part of this MP, in the main function in main.cpp create a StickerSheet that contains an image and at least three stickers. Before exiting main, save your creation to disk as myImage.png.
We’ll take a look at your photo filled of stickers! Keep it clean and something you’re okay being shared with the class so we can show the best ones off to the whole class! :)
To generate your creative StickerSheet, you can use the following commands.
make
./main
Testing
When you’ve finished Part 2 and Part 3, you can make the full MP by running:
make test
./test
Handing in your code
You must submit your work on PL for grading. We will use the following files for grading:
Image.cppImage.hStickerSheet.cppStickerSheet.hmain.cppmyImage.png
To submit your assignment you upload these file to the mp_stickers question on PrairieLearn.