Working with git
Overview of git
git is one of the most popular distributed version control systems used for software development. As a distributed version control system, git allows you to fetch the latest version of code from a repository, work on it, and push your changes back to the repository for others to view, use, and continue to develop on.
In CS 205, most of your work will be done in a collaboratively developed CS 205 Workbook. Using git will allow CS 205 to prepare starting code to get you started and have a way for you to fetch it, allow you to save and turn in your work through pushing your changes, and allowing back-and-forth on larger projects.
This page divides setting up git into three steps:
- Setting up your CS 205 repository on engr.illinois's gitlab (you need to do this only once, ever)
- Installing the git software to your computer (you need to do this only once per computer if git is not installed; eg: lab computers will already have git installed)
- Setting up a local clone of your repository (you need to do this only once per computer; you need to repeat this if you use a different computer)
Part 1: Setting up your CS 205 repository on engr.illinois's gitlab
Log into engr.illinois's gitlab
Go to https://gitlab-beta.engr.illinois.edu/cs205/workbook (you will need to sign in with your Illinois account)
Fork the cs205 workbook repository
Click to fork your own copy.
Once this is complete, you will be at your own copy of the repository! You should see the text "Forked from cs205" below the title workbook. This is your own copy of the workbook where you will submit all of your work, but it's also connected to the cs205 workbook for you to get the initial files that we provide.
Since you have your own copy, there are now two CS 205 Workbook repositories that you have access to. To help distinguish between the two, we'll refer to them with specific names:
- release is the repository owned by "cs205". This is the repository you forked from and will be where CS 205 will publish code for you to merge into your repository before you start each assignment.
- origin is your repository, owned by you! This is the repository you just created by clicking fork. This is where you will be storing all of your work on the server (the origin point for your files). Since you will be adding code to your origin repository, origin will be "ahead" of release because you will have added your work on top of the code we provide at the start in release.
Making your work private
In your repository (origin), click the dropdown and choose the last option, Edit Project.
Under the first section (Project settings), change the project's visibility level to Private.
Click Save Changes.
Sharing your work with Wade
In your repository (origin), click the dropdown and choose the first option, Members.
Search for the user waf, which will find Wade Fagen-Ulmschneider (waf).
Change the Project Access for Wade to Reporter.
Click Add users to project.
Part 2: Installing the git software to your computer
Checking if git is installed
Using a command prompt, type git --version.
If the output in your console is one line and starts with "git version" and displays the version of git, you have git installed and can skip this step.
If the output in your console is anything else (eg: `git` is not found), you do not have git. Find your OS below to install git.
Installing git on Windows
Download Link: https://git-scm.com/download/win (free, open source)
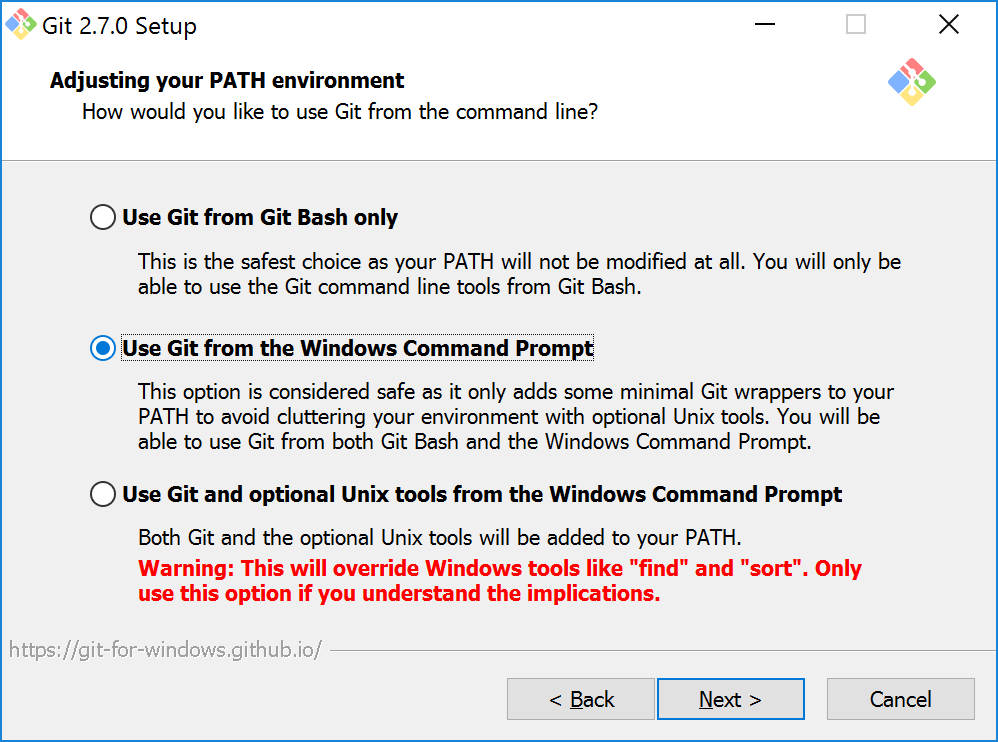
When installing, you will be asked about Adjusting your PATH environment. To allow for the most flexibility, you should change the default option to Use Git from the Windows Command Prompt. (See image on right; otherwise you will be unable to use git from standard Windows command line.)
All other default options are great.
Installing git on Mac
Download Link: https://git-scm.com/download/mac (free, open source)
All default options are good.
Part 3: Setting up a local clone of your repository
NetID for the correct URLs
The URLs you will be using in this section depends on your NetID. If you
enter your NetID, the links will be customized to your NetID:
Create your CS 205 folder
You can choose to store your CS 205 files anywhere on your computer. We find storing stuff in a folder on your desktop called "cs205" usually works out well, so all of our instructions assume you want to do that. If you choose to store it somewhere else, you'll need to navigate there instead of following the instructions given here.
Create a folder on your desktop called cs205.
Open your command line interface and navigate to your new cs205 folder.
This can be done by running the following commands:
cd Desktop
cd cs205
Clone your repository (origin) to your computer
In your cs205 directory, run the following command:
git clone https://gitlab-beta.engr.illinois.edu/netid/workbook.git
You will need to enter your NetID and password. When entering your password, the cursor will look like it's frozen to hide your password. You should continue to type it and press enter when done.
This git clone command created a new directory, workbook, which contains
the clone of your repository (origin). Move into the directory:
cd workbook
This command created a clone of your repository, origin, and stored it on your computer. This copy will be the copy you will edit. When you have changes you want to save back to the server, you will push those changes back to the origin.
Connect your local repository to the release repository
In your workbook directory, run the following command:
git remote add release https://gitlab-beta.engr.illinois.edu/cs205/workbook.git
Common Error
If you recieve the following error:fatal: Not a git repository (or any of the parent directories): .git...you are not inside of your workbook directory. This is often caused by being in the "cs205" directory and not in the workbook directory. Make sure you have run the
cd command from the
previous task.